Certifying Sealant Flow Behavior and Tackiness
Several test methods can evaluate sealant flow and tack.

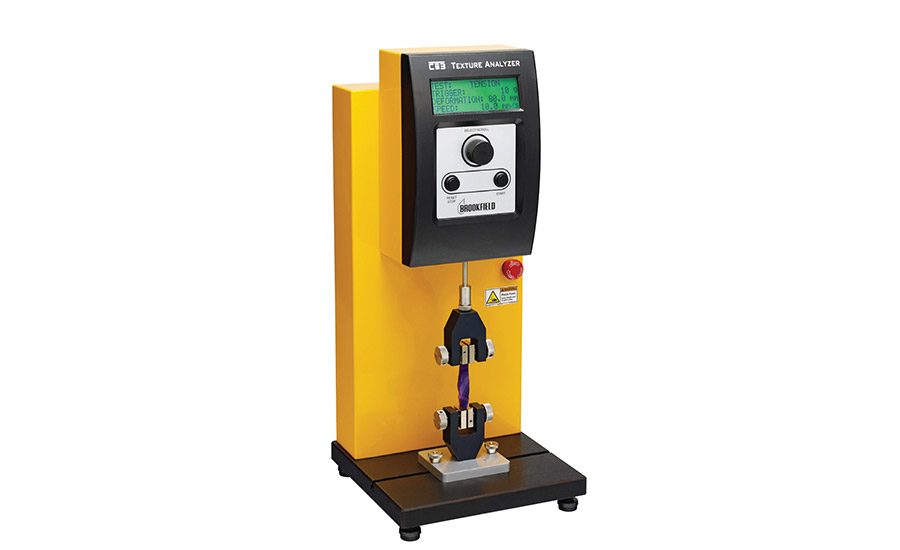
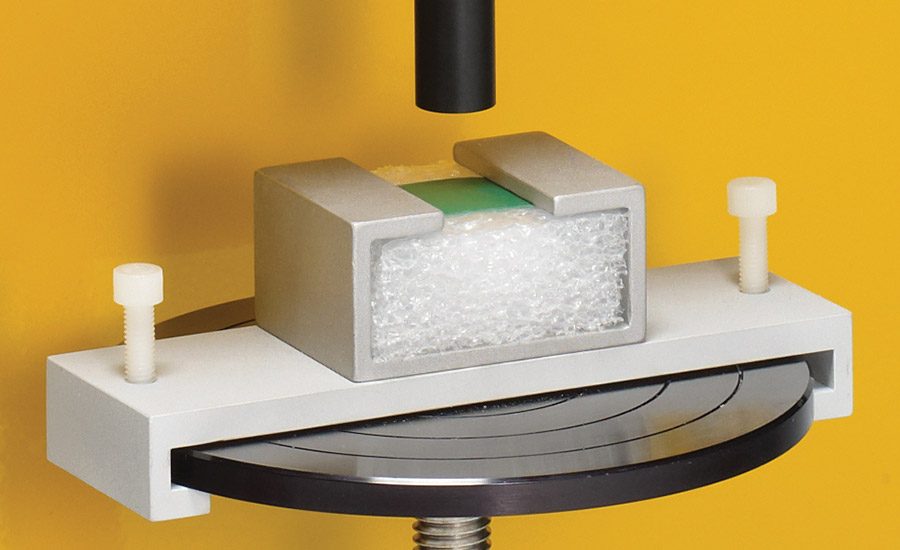
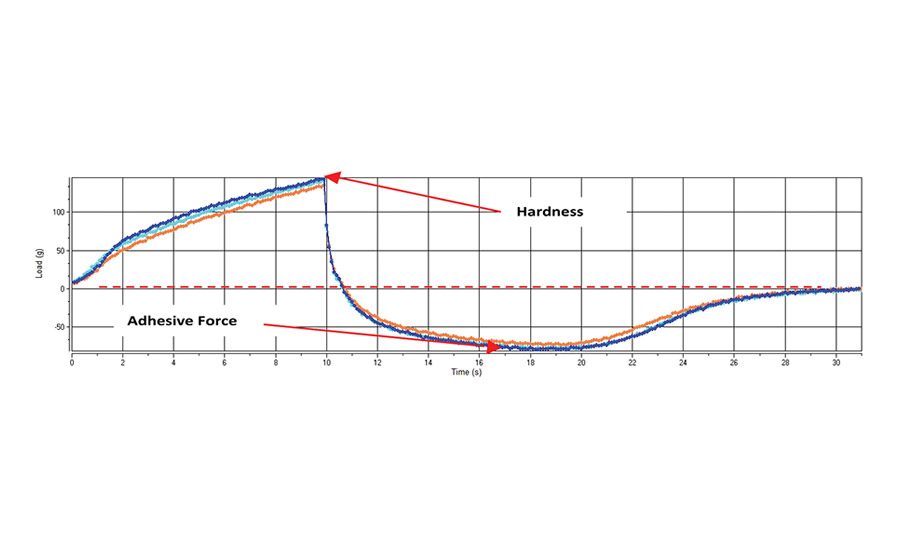
Figure 1. Load vs. time graph for firmness and tackiness of the sealant at room temperature. The peak value is a measure of firmness over the travel distance of 10 mm and the highest negative value a measure of the adhesive force of the samples.


Consumer and industrial products succeed in the marketplace because their performance meets expectations; adhesive and sealant materials are no exception. Ease of handling and use, ability to fasten together and seal, straightforward cleanup after application, and longevity for reliable performance are all points of evaluation that distinguish top performers from average products.
Viscosity measurement has long served as a simple quality control check for quantifying flow behavior of material during placement. More recently, compression/tension testing has become an important way to assess tack and hardness. Tension evaluates effectiveness of fastening materials together by pulling them apart after bonding, while compression quantifies protection against penetration by measuring the force needed to puncture the material.
Instruments that apply uniaxial compression and tension forces to materials are known as universal testers. Texture analyzers typically operate at relatively low forces, perhaps 50 kg maximum or less on average. These instruments are equipped with grips for pulling apart strips of material that have been glued together.
Various probes and fixtures can be used with the texture analyzer; the choice depends on the nature of the test and type of material under evaluation. One example is an adhesive tack tester fixture, which uses a cylinder probe attached to the instrument and the test material positioned in a brace. The tack test moves the cylinder probe into the sample material at defined speed and then pulls away while measuring the retraction (adhesive) force in tension mode. The following explanation gives the details for such a test.
Sealant Firmness and Tackiness Test
A compression test is used to measure the firmness and tackiness (adhesive strength) of the sealant material at room temperature using a 12.7-mm diameter cylinder probe. The sample is positioned centrally under the probe, and the probe is lowered to approximately 20 mm from the sample surface. This gap is necessary to provide room for the probe to fully pull away from the sealant during the return stroke. A compression distance of 10 mm is used at a test speed of 1 mm/s after a trigger force of 4.5 g had been detected on the sample surface. The return speed is also set at 1mm/s.
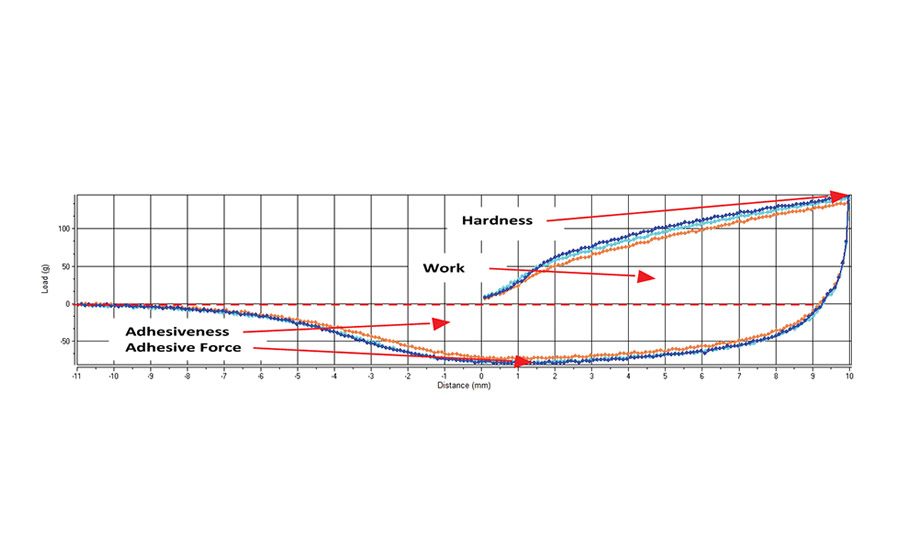
Figures 1 and 2 (p. 17) show the results taken from three samples of the same sealant. The first graph reports the measured force experienced by the cylinder on the y-axis as a function of time on the x-axis. During downward movement, the probe is in compression mode. As the probe retracts, it operates in tension mode because it is pulling away from the sealant material.
Figure 2 illustrates the same test, but replaces the time axis with distance traveled by the probe. The amount of “work” performed during compression and tension modes is calculated by integrating the force over the distance. This gives rise to the calculated values for hardness work done and adhesiveness, respectively.
Table 1 (p. 15) summarizes the results for the three samples that were tested. Using the methodology previously mentioned, the tack test has become the standard QC procedure for verifying adhesive performance in many industries. Product samples are cut into small rectangular strips carpets, ceramic tiles, wallpaper and pasted with the test adhesive. The texture analyzer applies a compressive force to the product sample after it is placed on a substrate that simulates floor or wall material. The tester pulls the product sample off of the substrate and measures the force required to do this. ASI
For more information, phone (44) 1279-451774, fax (44) 1279-451775, email c_freeman@brookfield.co.uk or visit www.brookfield.co.uk.
Looking for a reprint of this article?
From high-res PDFs to custom plaques, order your copy today!


