BYK-GARDNER: Color, Gloss, and Surface Texture Analyzer
Like our visual judgement, the new spectro2profiler reportedly measures color, gloss, and surface structure simultaneously in a robust, portable tool.

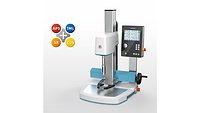
BYK-Gardner recently announced the launch of its new spectro2profiler, an instrument to measure color and gloss, as well as the 3D topography of the surface texture. Visual quality perception is influenced by color, gloss, and the surface structure. Like our visual judgement, the new spectro2profiler reportedly measures all three parameters simultaneously in a robust, portable tool.
The spectro2profiler uses a circumferential illumination at 45° with 0° viewing. The company reports that an extra-large measurement spot with homogenous illumination guarantees highly repeatable and representative readings. High accuracy and inter-instrument agreement are reportedly ensured, enabling the use of digital standards.
“Brand new is the 3D-structure analysis,” said Christopher Groh, Ph.D., R&D project manager at BYK-Gardner. “The spectro2profiler takes multiple images under different illumination directions to estimate surface curvature. As a result, you get objective measures for cell size (mm²) and perceived cell amplitude (P-μm). Different grain types can be easily differentiated—ideal for design and new supplier approval.”
In addition, BYK-Gardner reports that the spectro2profiler provides a 2D camera-based reflectivity measurement for structured surfaces. The perceived depth of a leather-like surface is dependent on the reflection behavior on the hills and valleys. Therefore, a 2D reflectivity measurement is aligned with the 3D image data to separate the reflection of hills and valleys. The new measurement parameter, reflectivity contrast Rc, is an ideal measure for production QC of injection- or slush-molded parts. To compare historical data, the instrument also measures traditional 60° gloss according to international standards.
The spectro2profiler can be used to objectively analyze structures of different applications by using specific algorithms. The large color touchscreen with an icon-based menu ensures intuitive operation. An integrated camera shows a live preview of the measurement spot to prevent false readings on imperfections or scratches.
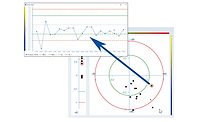
Color, gloss, and 3D topography data are reportedly efficiently analyzed with the software smart-chart. A standard management is included that allows defining pass/fail tolerances for all three parameters. Measurement results are simultaneously displayed in a data table, while a variety of graphs highlight samples that are out of specification. The 2D/3D analysis is supported with color-coded images to visualize the measurement data for ease of interpretation.
Additional details are available at www.byk-instruments.com.
Looking for a reprint of this article?
From high-res PDFs to custom plaques, order your copy today!


